BGSU Events Calendar Resources
Planning an event? The BGSU events calendar is intended for events organized, hosted, presented or co-presented by University colleges, schools, departments, centers and official student organizations.
To help ensure that your event listing reaches its intended audience and entices them to attend, we’ve compiled these helpful guidelines.
If you have questions, please contact the Office of Marketing and Communications.
How to submit an event to the BGSU event calendar
- Navigate to events.bgsu.edu.
- Select Log in
- Select the second option, Log in with School ID
- Add your BGSU Username and Password and Sign in
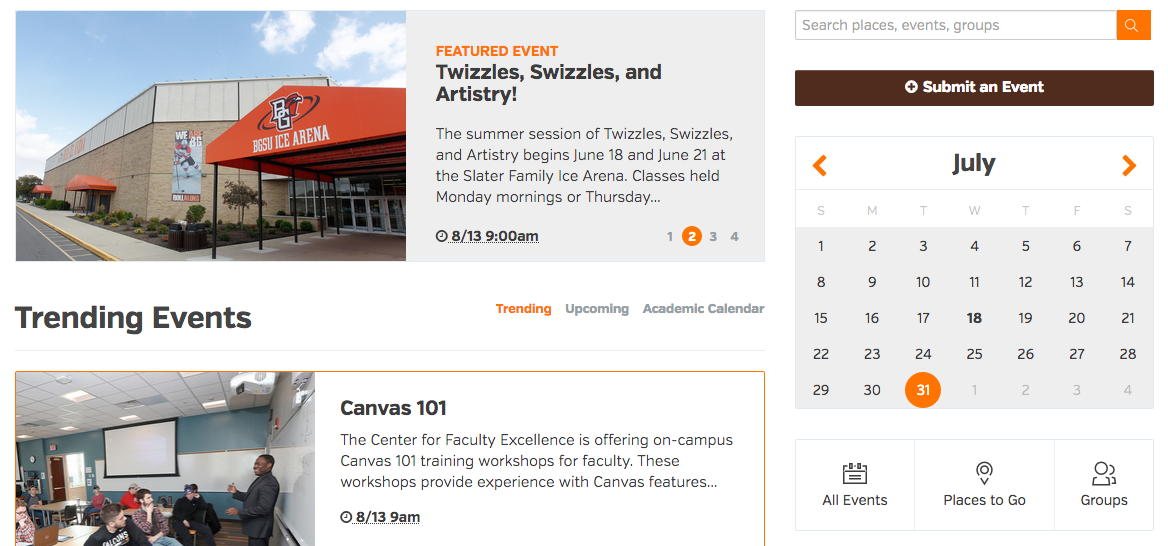
After you have logged in, you will be redirected to the home page and the option to Submit an event will be available.
PLEASE NOTE: BGSU does not accept event listings from outside individuals or organizations, with the exception of conferences or events held in University facilities. BGSU reserves the right to approve, reject or edit any events submitted to the calendar. Submissions that do not include the required fields, including a description or group, will not be posted. Events submitted less than five days before the event date may not be posted.
How to create a BGSU event page
- Required fields – title, description, date, start time, location and group. Not including all information before submission may result in a delay in event posting.
- Suggested fields – end time (if known), parking information, ticket and registration information, contact information
- *Please note: Any registration that requires payment must be handled with Conference and Event Services. They will create a registration link that can be included within your event description.
- Upload a photo (required) – Please ensure that the photo specs are 1000 x 636. If you do not select a photo, one will automatically be assigned based on your event’s location. Do not use an event flier as your photo. Do not use photos you do not own. Do not use watermarked photos. Alt text for photos is required.
- If an event is not open to the public, include a line mentioning that in the description.
- Place your event in the appropriate group. Do not place the event in a group you are not associated with
Best practices
Implementing these tips will increase the awareness of, and traffic to, your event listing:
- Use a description of at least 160 characters
- Post your event at least seven days beforehand. Ideally, events should be submitted at least 30 days beforehand.
- If you want people to use a specific hashtag on social media, be sure to include that information in the hashtag field.
- Tag your events with important words.
- Remember that you are writing for the public. Make sure the information would make sense to someone outside your department.
- Be as specific as possible. For example, Undergraduate Symposium on Diversity, not Symposium.
- Avoid acronyms.
- Use the term presented or co-presented rather than sponsored.
Formatting
- Do not use all caps
- BGSU standard is AP format
- Times should be listed as 10 a.m. or 1:15 p.m., not 10AM or 115pm
- Enter phone numbers in ###-###-#### format
- Link URLS to text. Do not show entire URLs. Use action words when appropriate, such as “Download flier.” Avoid using the phrase “Click here.”
- Don’t forget to proofread!
Access
- If you are a University faculty or staff member and would like advanced access to this calendar, please contact ssavoyb@bgsu.edu.
- In an effort to meet the University’s communication expectations and goals, students cannot have advanced access to the calendar at this time.
- All activity by advanced users is logged by the system. Users who abuse privileges will be removed from the system.
Localist FAQs
All users with a BGSU username and password will be able to log in and submit an event. Users who require further privileges, such as the ability to review and approve events for their group, will need to reach out to Marketing and Communications or fill out this form to receive training and access. Please include your name, title, role in event promotion and for what department you are requesting access.
To get started:
- Go to events.bgsu.edu
- At the top right, click Log In
- Then click Login with School ID
- Follow the prompts to log you in
- Once you’re in, at the top right, hover over the square with the silhouetted avatar inside and click Calendar Admin. This will take you to your localist dashboard.
As an Event Admin, you will be able to approve all the events that come in for your groups. If a basic calendar user submits an event for your group, it will go to pending until you approve it.
Within AEM, add an event list component to your webpage. In the event list dialog box select your preferred display style, type the number of events you would like to be displayed, then select a filter type, group, keyword, tag or place.
- Groups must match the name of your group exactly as it appears in the last part of the event calendar group URL.
- Ex: Recreation and Wellness group URL is https://events.bgsu.edu/group/department_of_recreation_and_wellness
- The group input for the component would be
- department_of_recreation_and_wellness
- Keywords and tags could be used for more specific events within departments or offices
- Place is used for locations on campus that frequently have events. The place name in the event list component must match the name of the place exactly as it appears in the last part of the event calendar place URL.
- Ex: Bowen Thompson Student Union place URL is https://events.bgsu.edu/bowen_thompson_student_union
- The place input for the component would be
- bowen_thompson_student_union
Within AEM, add an event list component to your webpage. In the event list dialog box select your preferred display style, type the number of events you would like to be displayed, then select a filter type, group, keyword, tag, or place.
- Groups must match the name of your group exactly as it appears in the last part of event calendar group URL...
- Ex: Recreation and Wellness group URL is https://events.bgsu.edu/group/department_of_recreation_and_wellness
- The group input for the component would be
- department_of_recreation_and_wellness
- Keywords and tags could be used for more specific events within departments or offices
- Place is used for locations on campus that frequently have events. The place name in the event list component must match the name of the place exactly as it appears in the last part of the event calendar place URL...
- Ex: Bowen Thompson Student Union place URL is https://events.bgsu.edu/bowen_thompson_student_union
- The place input for the component would be
- bowen_thompson_student_union
Yes, if your department, office or place has been added to the platform, a specific page has been created for it. If your group has not been added to the calendar yet, please contact amart@bgsu.edu.
- Go to events.bgsu.edu and select submit an event on the right side of the page.
- Title
- Name: (Required) This will be displayed as the event’s name in the main listing and on corresponding details pages.
- After you have entered the event’s name, Localist may display a future duplicates warning below the field, which will detail if there are any possible matching events either in the past or future. It’s a substring match, so if there are three characters in a row anywhere in the title that match an event currently in the system, the warning links will be displayed.

- Description: No character limit. Embedding and HTML is available only to admins.
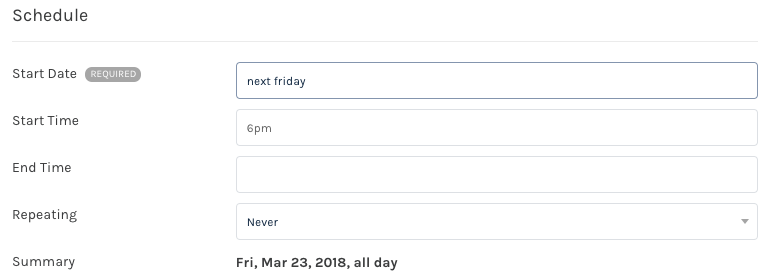
- Start Date: There are several ways you can enter a date: Oct 3, October 3, 10/3, “Next Friday,” “Tomorrow,” 10/3/14, etc. As you type the date below the field will update accordingly.
- Start / End Time: Use “6pm,” etc. Events do not require these times, but if there is an end time then there should be a start time.
- Recurs: By default events are set to never recur, but you have the option of daily, weekly or monthly. See Recurring Events article for more information.
- Event Place
- You can either select to manually enter a place name + address (use: option) or you can select a place landing page, which will automatically pull in the saved address.
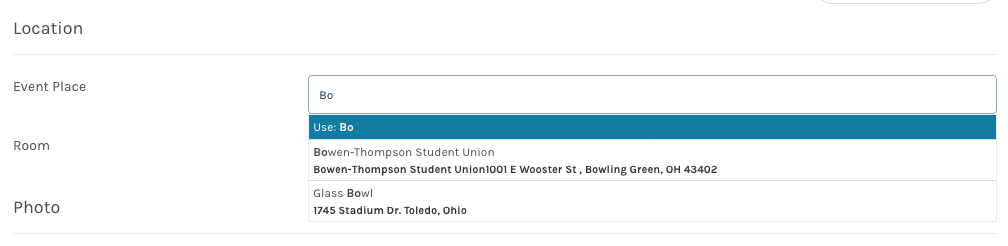
- Use: By selecting this option, you will not be connecting a place landing page and will instead be using a custom location.
- If you select to use a custom option, such as Use: Centennial Hall, as shown below, then fields for Address and Directions will appear.

- Room: This can be words or numbers.
- You can either select to manually enter a place name + address (use: option) or you can select a place landing page, which will automatically pull in the saved address.
- Photo
- Hover over the gray square and a Edit Photo button will appear. Upload Photo will pull from your computer and Browse Library will open a small window to browse previously uploaded photos (this library is not searchable).
- Descriptors
- Filters: Select all that apply.
- Ticketing
- Tickets & Registration can be found in the tab at the very top of the "Add an Event" page.
- Ticket Cost: Enter any number with accompanying text, such as $50 door. If the event is free then leave this field blank or enter “free.”
- Ticket URL: This can be any URL. If a price is entered for ticket cost then this button will display Buy Tickets, but if there is not cost or the event is free then this button will display Register.
Additional Details
- Social Hashtag: When entered, Localist will monitor mentions of the hashtag and take mentions into consideration in the trending algorithm. Do not include the hashtag as it will automatically be added. Note: Only one hashtag can be used.

- Go to events.bgsu.edu/admin and log in with "Your School ID"
- In the admin dashboard, select Events > +Add Event
- Title
- Name: (Required) This will be displayed as the event’s name in the main listing and on corresponding details pages.
- After you have entered the event’s name, Localist may display a future duplicates warning below the field, which will detail if there are any possible matching events either in the past or future. It’s a substring match, so if there are three characters in a row anywhere in the title that match an event currently in the system, the warning links will be displayed.
- Description: No character limit. Embedding and HTML is available only to admins.
- Start Date: There are several ways you can enter a date: Oct 3, October 3, 10/3, “Next Friday,” “Tomorrow,” 10/3/14, etc. As you type the date below the field will update accordingly.
- Start / End Time: Use “6pm,” etc. Events do not require these times, but if there is an end time then there should be a start time.
- Recurs: By default events are set to never recur, but you have the option of daily, weekly or monthly. See Recurring Events article for more information.
- Event Place
- You can either select to manually enter a place name + address (use: option) or you can select a place landing page, which will automatically pull in the saved address.
- Use: By selecting this option, you will not be connecting a place landing page and will instead be using a custom location.
- If you select to use a custom option, such as Use: Centennial Hall, as shown below, then fields for Address and Directions will appear.
- Room: This can be words or numbers.
- You can either select to manually enter a place name + address (use: option) or you can select a place landing page, which will automatically pull in the saved address.
- Photo
- Hover over the gray square and a Edit Photo button will appear. Upload Photo will pull from your computer and Browse Library will open a small window to browse previously uploaded photos (this pool is not searchable).
- Descriptors
- Filters: Select all that apply.
- Custom Fields: If you have added custom fields to your platform they will be listed after filters.
- Ticketing
- Tickets & Registration can be found in the tab at the very top of the "Add an Event" page.
- Ticket Cost: Enter any number with accompanying text, such as $50 door. If the event is free then leave this field blank or enter “free.”
- Ticket URL: This can be any URL. If a price is entered for ticket cost then this button will display Buy Tickets, but if there is not cost or the event is free then this button will display Register.
Additional Details
- Keywords: This field can be used for SEO purposes or for hidden tagging for widget purposes. These are not displayed publicly.
- Tags: These are displayed publicly and can be used to group like events that don’t warrant an entire designated filter, such as “Homecoming.”
- Social Hashtag: When entered, Localist will monitor mentions of the hashtag and take mentions into consideration in the trending algorithm. Do not include the hashtag as it will automatically be added. Note: Only one hashtag can be used.
- Event Website: This can be any website.
- Facebook Event Page: Linking to a FB event page will allow Localist to automatically pull in and display RSVPs to the FB event on the Localist event details page.
- Owner: This field will display the email of user who created the event. If ownership needs transferred, the email just needs changed to the new owner’s email. Note: Events that are added via a bulk upload or feed do not receive an owner.
Settings
- Allows User Activity: This is checked by default. Unchecking this disables comments, reviews and user-added photos.
- Allow User Attendance: This is checked by default. Unchecking this disables the “I’m Going” and “Invite Friends” functionalities.
Visibility
- Visibility: Events can be visible to everyone, visible only to users who are logged in, or 100% hidden from the calendar.
- Venue Page Only: The event will only display on the place’s landing page.
- Exclude from Trending: Checking this flag will prevent an event from appearing in the trending list.
Once an event is saved, the form will show that the event is Verified.
All events will be approved by a University calendar editor or event administrator. BGSU reserves the right to approve, reject or make special considerations for any event submitted to the calendar. Currently, event admin rights are assigned by Marketing and Communications.
Only event admins, selected by mMarketing and Communications, will be able to approve pending events.
To approve an event that has all the required content:
- Log into Localist
- Click on "pending" on the middle of your dashboard (or click on Events tab in the left navigation and then click pending)
- This will take you to a dashboard of all your pending events and along the right hand side there will be an option to "Approve" or "Reject" an event.
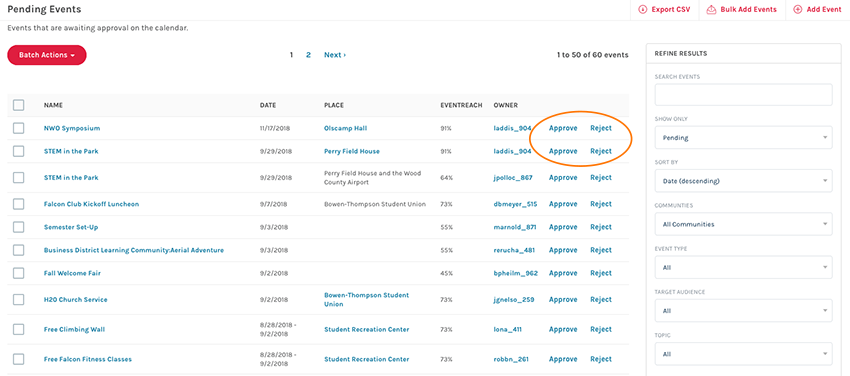
- If you "Approve" an event the event will go live.
- If you "Reject" an event, you must submit a reason as to why and it will notify the submitter.
To approve an event that you have edited:
- If you have already opened the event and added or updated the event's content
- Then scroll up to the top of the page and click the "Approved" checkbox.
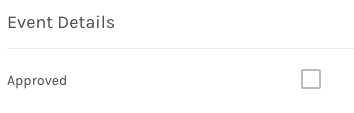
- THEN click the red button that says "Save Changes" in the bottom right corner to update the event and make it live to the public
If you do not have calendar editing access, you need to contact your respective Marketing and Communications manager about modifying any previously approved events.
If you are an event admin:
- Login to Localist and click on the event you want to modify or delete.
- Once the event is opened, add or change the content in their respective fields
- Click the red button that says "Save Changes" to save and update the live event.
- Or click delete if the event needs to be deleted for whatever reason
- *If the event is canceled, we suggest you keep the event up and retitle it. Type "Cancelled" in front of the title, so that users can still find the event and see that it is cancelled. Then in the description you can put the reason for cancellation, if necessary.
- *If the event is canceled, we suggest you keep the event up and retitle it. Type "Cancelled" in front of the title, so that users can still find the event and see that it is cancelled. Then in the description you can put the reason for cancellation, if necessary.
Updated: 04/07/2026 05:41PM