Using Visual C++
The Microsoft Visual C++ compiler is available as part of Microsoft Visual Studio in all campus computer labs.
These steps show you how to compile and execute a traditional C++ program using Visual C++. This will build a "console application" that allows you to use cin and cout and the other standard C++ features.
- Start Microsoft Visual Studio.
- On the left side of the main windows click New Project... select Visual C++ in the list on the left side of the dialog and you will see this screen:
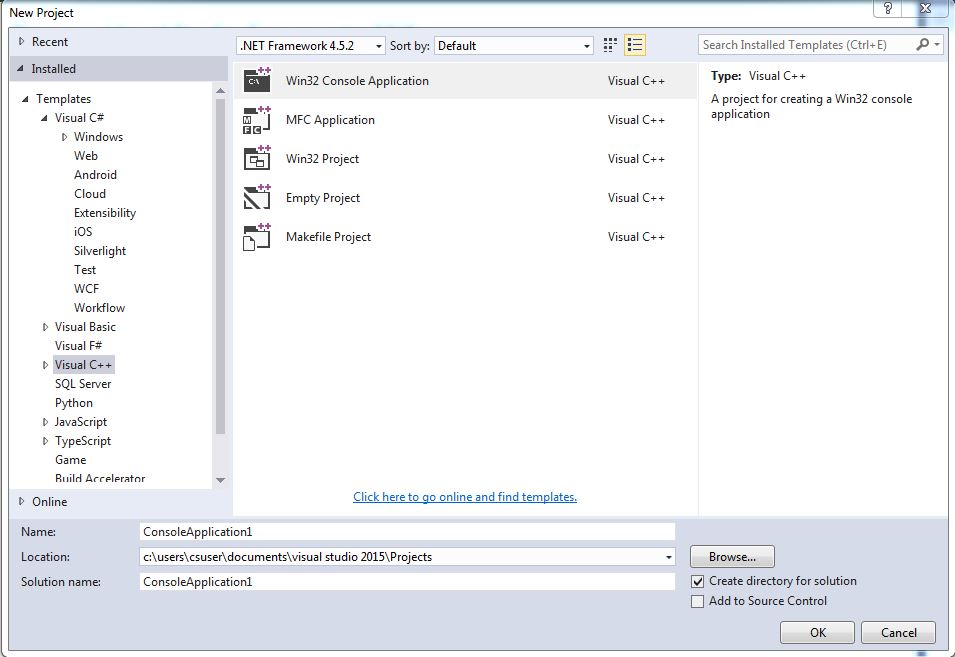
- Click on Empty Project. Fill in the project name (Name:) and click the Browse button to select a directory for your project. Select a location on your personal hard disk or on a USB flash drive in a computer lab. Be sure that the boxes at the bottom labeled "Create directory for solution" and "Add to source control" are both unchecked. Then click OK. A new folder will be created in the specified location with the project's name. In this example the project is being created on a specific user's personal computer.
- To create files to add to the project, such as your main C++ program, choose Project | Add New Item and you will see this dialog:
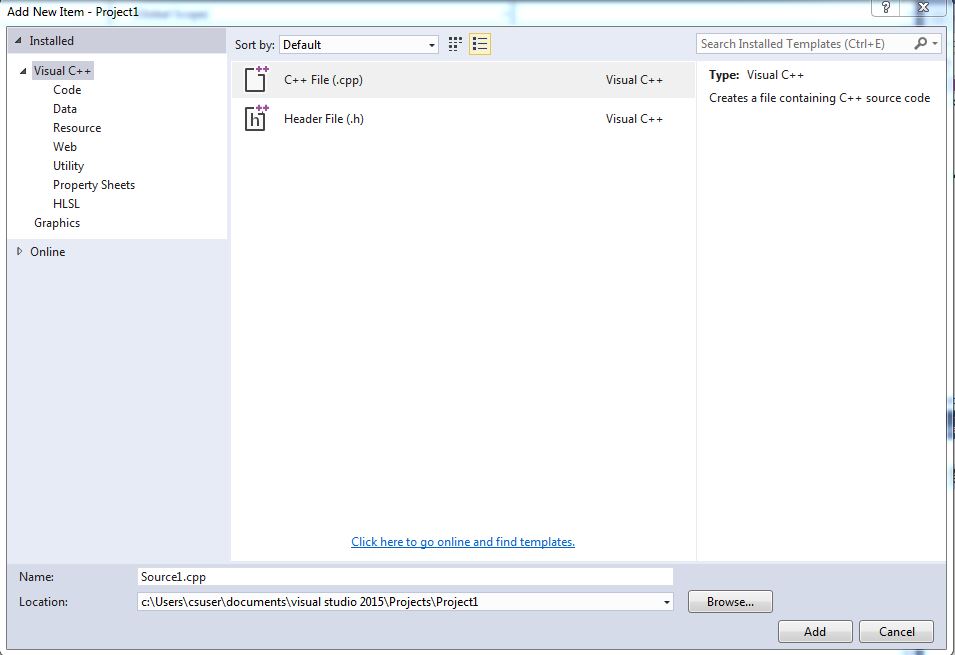
Click on C++ File or on Header File and give the name of the file below. For your main program, you might choose the name main.cpp. Do not change the Location field. When you click Open, a window with this name will appear and you can begin to type your program.
- If you have files already available that you want to add to this project, such as supplied C++ implementation files or header files, first copy the files into the folder for this project. Then choose Project | Add Existing Item to add the files to the project.
To edit an existing file, double-click the filename in the Solution Explorer window.
- To compile your program, click Build | Build Solution.
- If there are error messages in the bottom window, double-click on each message to go to the location of the error in your file. Fix the errors and build your program again.
- Execute your program by pressing Ctrl-F5 or clicking Debug | Start Without Debugging. This will allow you to see any output generated by your program. To use the debugger, press F5 or click Debug | Start Debugging. If you use this approach, your output window might disappear before you have a chance to read it. To prevent this, click Debug | Start Without Debugging instead.
Use one of the following strategies to return to your project after closing Visual C++:
- double-click the solution file (which ends in extension .sln), or
- choose Open | Project/Solution from the File menu and choose the solution file (ends in .sln), or
- select the solution from Recent Projects at the bottom of the File menu.
Warning: Microsoft Visual C++ gives no warning or error for a statement such as the following:
if (a = 5) ... [which presumably should have been written "if (a = = 5) ..."]
To cause a warning to be generated for this situation, choose Project | Project Properties and click on C/C++ Command Line. You will see the window below:
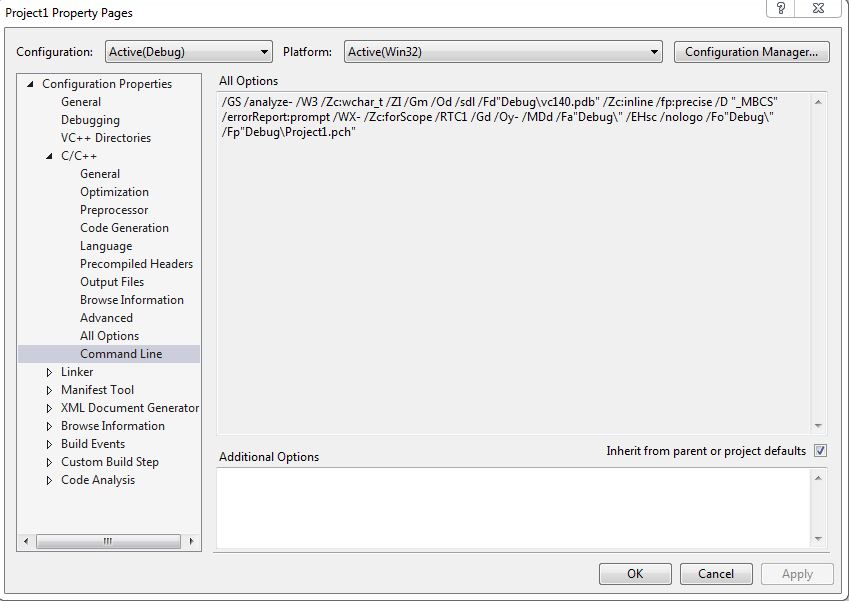
Type /w14706 in the Additional options frame, click the Apply button, then click OK. You will now get the desired warning. Unfortunately, you will need to repeat this step for each C++ project.
BGSU B.S. in Computer Science is accredited by the Computing Accreditation Commission of ABET, www.abet.org, under the commission’s General Criteria and Program Criteria for Computer Science.
BGSU B.S. in Software Engineering is accredited by the Engineering Accreditation Commission of ABET, www.abet.org, under the commission’s General Criteria and Program Criteria for Software Engineering.
Updated: 06/26/2019 05:53PM